3D Polygon - draw planes with Matlab
In this example we’re going to explain how to draw a 3D polygon using Matlab. More specifically, we are going to draw several flat surfaces (planes) to build or model a box.
The sentence fill3(x, y, z, c) would fill the 3D polygon defined by vectors x, y and z with the color specified by c. The vertices of the polygon are specified by coordinates of components of x, y and z, and the polygon is closed by connecting the last vertex to the first one.
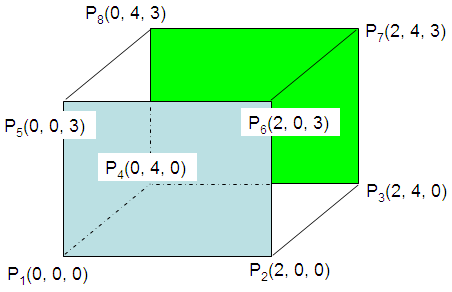
Let’s say that we want to draw this arbitrary rectangular box
P 1(0, 0, 0)
P 2(2, 0, 0) P 3(2, 4, 0) P 4(0, 4, 0) P 5(0, 0, 3) P 6(2, 0, 3) P 7(2, 4, 3) P 8(0, 4, 3)
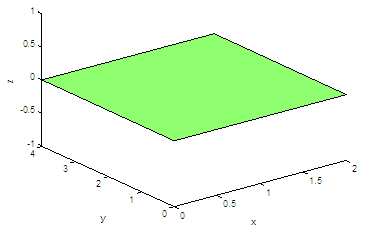
We could draw our first flat surface by filling the area defined by the first four points, like this:
x = [p1(1) p2(1) p3(1) p4(1)];
fill3(x, y, z, 1); The code produces this figure:
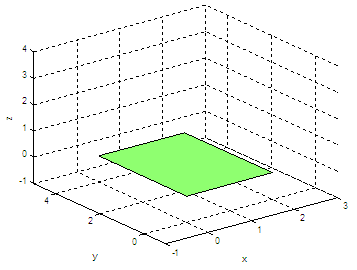
We can expand our axes, add a grid and hold the image in order to add more planes...
axis([-1 3 -1 5 -1 4])
produces...
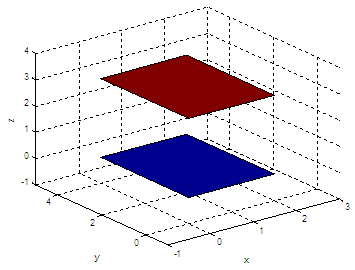
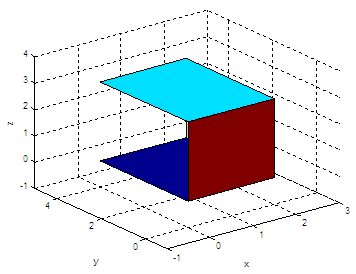
We can draw a second surface or plane defined by the last four vertices:
And the result now is:
We can add more surfaces by connecting the appropriate vertices, in the correct order. If we continue our code above with x = [p2(1) p6(1) p7(1) p3(1)]; x = [p2(1) p6(1) p5(1) p1(1)];
The resulting 3D-image is the following figure:
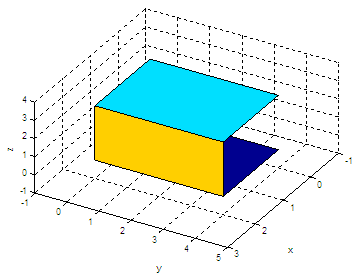
view(120, 50)
function
poly_rectangle(p1, p2, p3, p4)
We can call that function from any other script or from the command window. Let’s try it:
poly_rectangle(p3, p4, p8, p7)
What did you get? From '3D Polygon' to Matlab homeFrom '3D Polygon' to 3D figures
|
undefined undefined undefined undefined undefined undefined undefined undefined undefined undefined undefined undefined undefined undefined undefined undefined undefined undefined undefined undefinedundefined undefined undefined | undefined